# RETOPO
**1) Select your model, and in the command line type ‘****polyRemesh****’.
**
This will perform an operation similar to the ‘add divisions’ tool - subdividing your model -but in this case using triangulation to get a more accurate representation of your model.
(Make sure your history has been deleted, and keep a backup of your original model).


**2) Play with the settings of the polyRemesh to increase or decrease the subdivisions if it hasn’t accurately captured your geometry.**
This can be tricky to find a nice balance but is definitely worth it to help make your geometry a consistent level of detail.
**3) Once its remeshed, select your model again, and again in the command line type ‘****polyRetopo****’.**
Play with its settings to tweak the output model as needed. Again this can be tricky
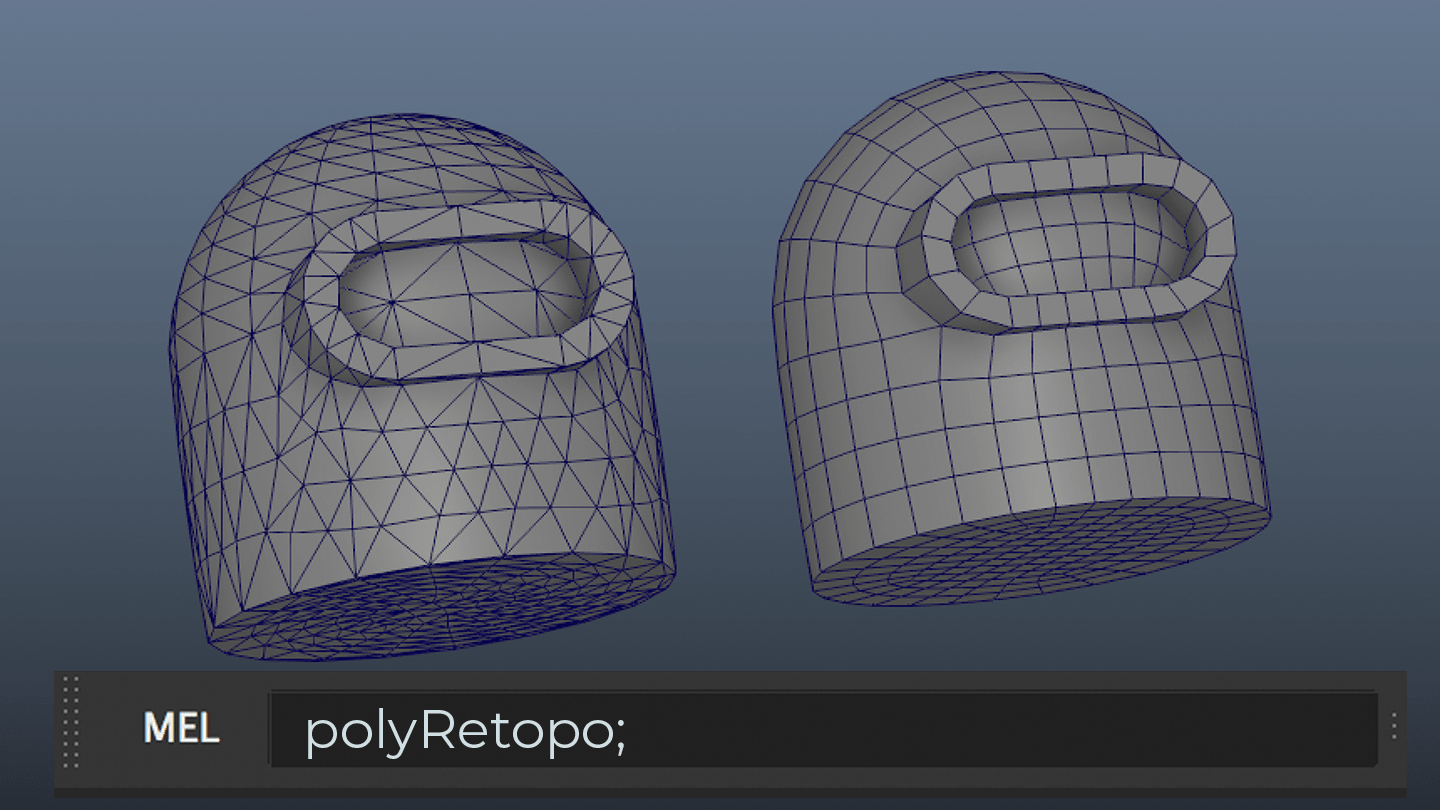
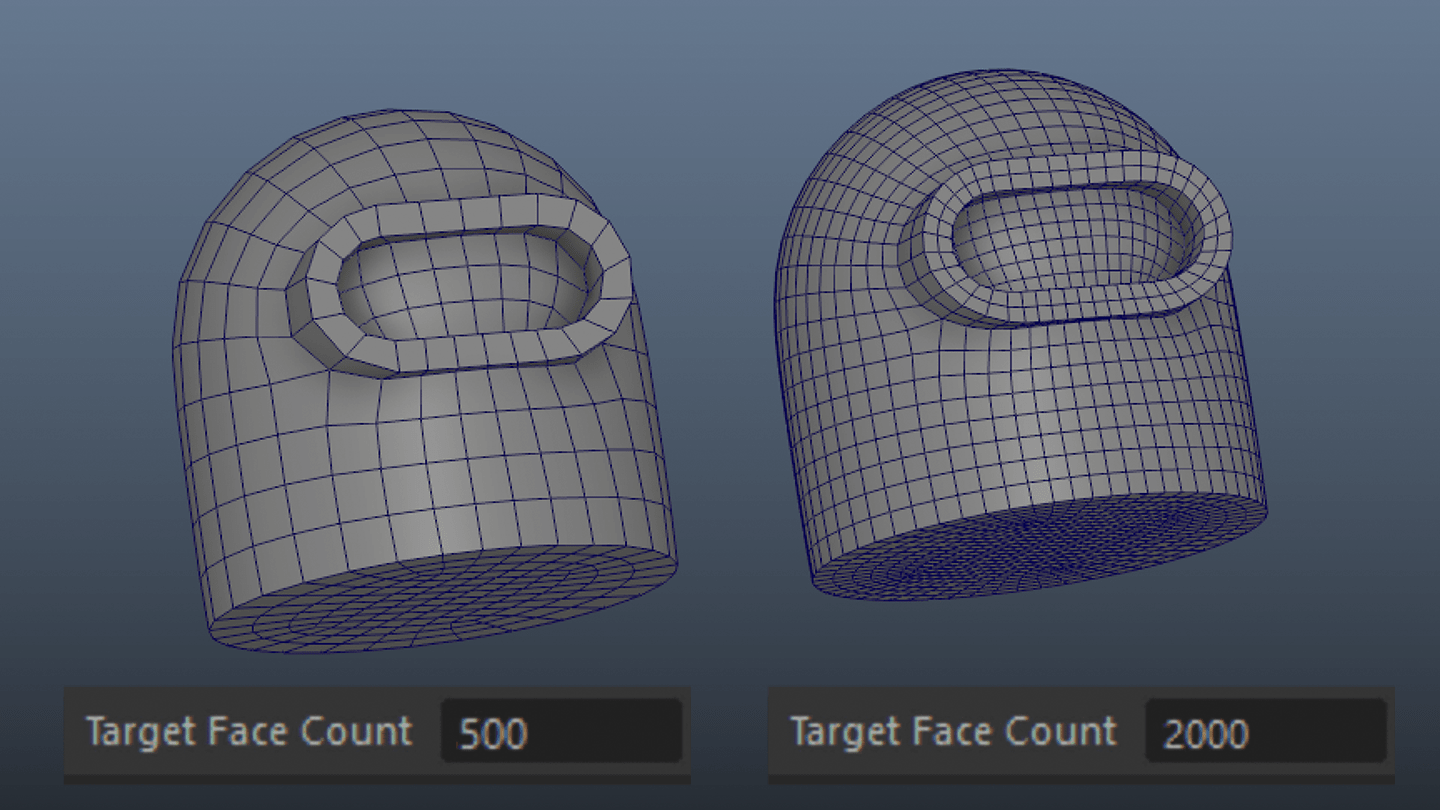
**4) Play with the settings of the polyRetopo**
For this you'll only really need to change the Target Face Count. If you've done everything else right, this should be all you'll need.
### Tips and Troubleshooting

The polyRemesh and polyRetopo nodes both respect hard edges (but not Edge Creasing) so ensure that your model had the right soft/hard edges before using them.
Additionally by putting in some temporary hard edges you can force the Retopo to keep that line intact.

Keep in mind that you don't need to use polyRemesh to retopologize (polyRemesh and polyRetopo are completely seperate node operations). polyRetopo will work with any mesh.
**But** you will get better results if you do use it as it will provide better uniformity to the models resolution/detail
# MATERIALS
- Assign material depuis le shader network an drag and drop middle click
**No Subdivision**
type : none
Iterations : 0
Uv Smoothing : pin_corners
Auto Bump : Off
Height : 0
Displ Zero : 0,5
**Subdivision**
type : catclark
Iterations : 2
Uv Smoothing : pin_corners
Auto Bump : Off
Height : 0
Displ Zero : 0,5
**Displacement**
type : catclark
Iterations : 3
Uv Smoothing : linear
Auto Bump : On
Height : 1
Displ Zero : 0,5